A pearl border can really make your wedding cake or party cake look amazing! See a super easy tutorial here.
I like to use fondant or gum paste for making pearl borders for my cakes. It is a simple method if you are a beginner and it does not require much practice to make the pearls look beautiful. This is quite easy compared to making pearls from royal icing which I think can be more tricky.
You will need:
Fondant / gum paste (I prefer fondant)
Duster with corn flour
Tylo powder (only needed for fondant)
A sharp knife or a metal spatula
Silicone mold (I use a mold from First Impression Molds which I think is easy to use)
Edible glue
Directions
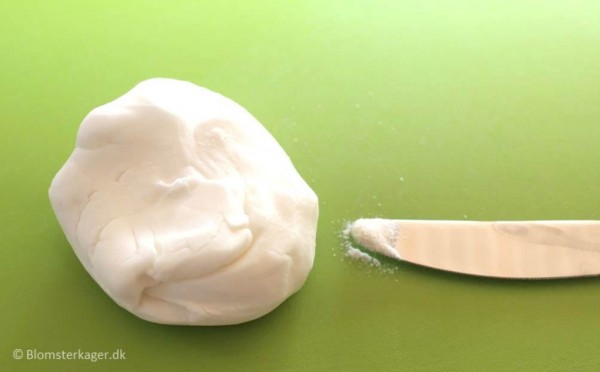
1) Knead the fondant or gumpaste and add a pinch of tylo powder so that the fondant becomes easier to work with (if you use gum paste you don’t need the tylo powder). Please notice: If the fondant or gumpaste is left on the table for a while it will dry out and become unusable. I always protect the fondant by wrapping it in a plastic bag when not in use.
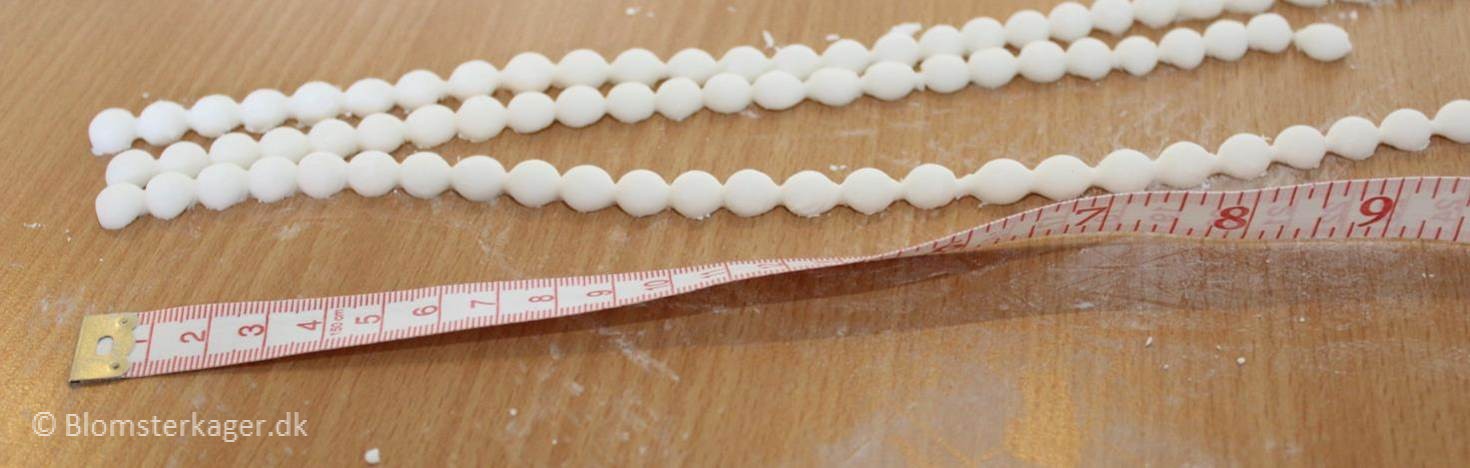
2) Now, take your pearl silicone mold. The mold that I use, comes in 3 different sizes – 6, 8 and 10 mm.
Tip: If you are making a tiered cake, it looks very elegant to use the biggest size mold for the base cake and the smaller size molds for the 2nd and 3rd tier.

3) Using your corn flour duster, dust the mold to ensure that it will be easy to remove the pearls from the mold.

4) Roll out the fondant into a long “sausage” shape. The fondant should have approx. the same size as the mold.

5) Place the fondant on top of the mold. Then, press it gently into the mold with your fingers.

6) Then, trim any excess fondant off. I use a metal spatula or you can use a sharp knife but make sure that you don’t cut the mold. Place the spatula flat against the mold and start from one end of the mold.

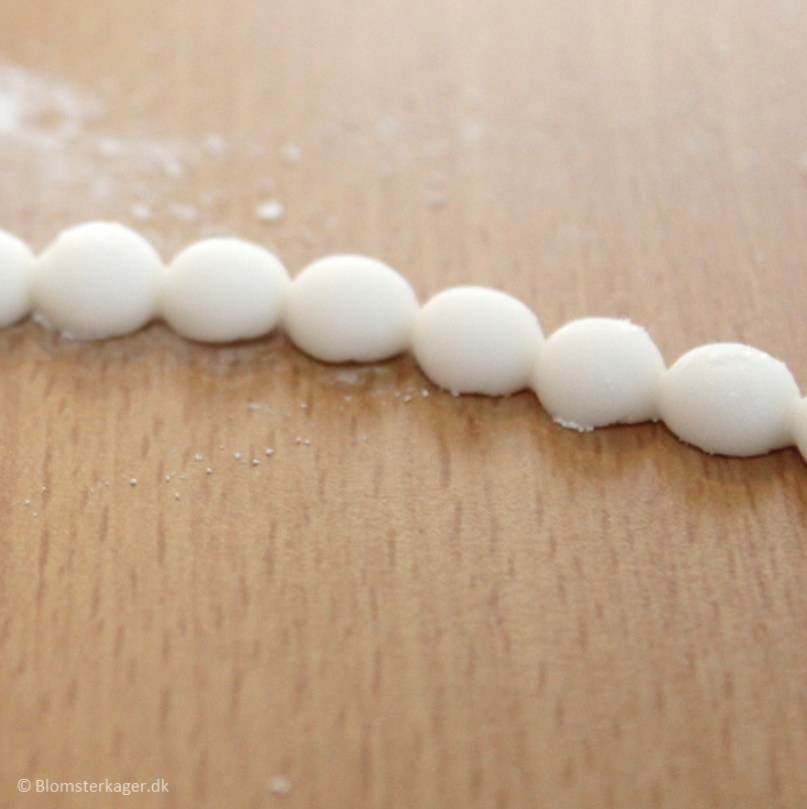
It should look like this when you are done.

7) Gently press the fondant into the mold with your fingers again to ensure that all the holes are completely covered with fondant and to remove any excess fondant. You can also add a bit of extra fondant to the mold if you think it is necessary.

8) Place the mold in the freezer for 5 minutes to make sure that it the fondant is firm and won’t stretch when you remove it from the mold.
Afterwards, flip the mold over upside-down and bend it backwards and the pearls will come out. Continue until all the pearls have been released from the mold. Allow the pearls to harden for 5-10 minutes and now they are ready to use.


9) To calculate how many pearls you need to make, measure the diameter of your cake with a tape measure and compare to the size of your pearl borders/mold.
10) In order to place the pearls on the cake, I add a small amount of edible glue to the border of the cake and then I apply the pearls to the cake with the flat side against the cake.
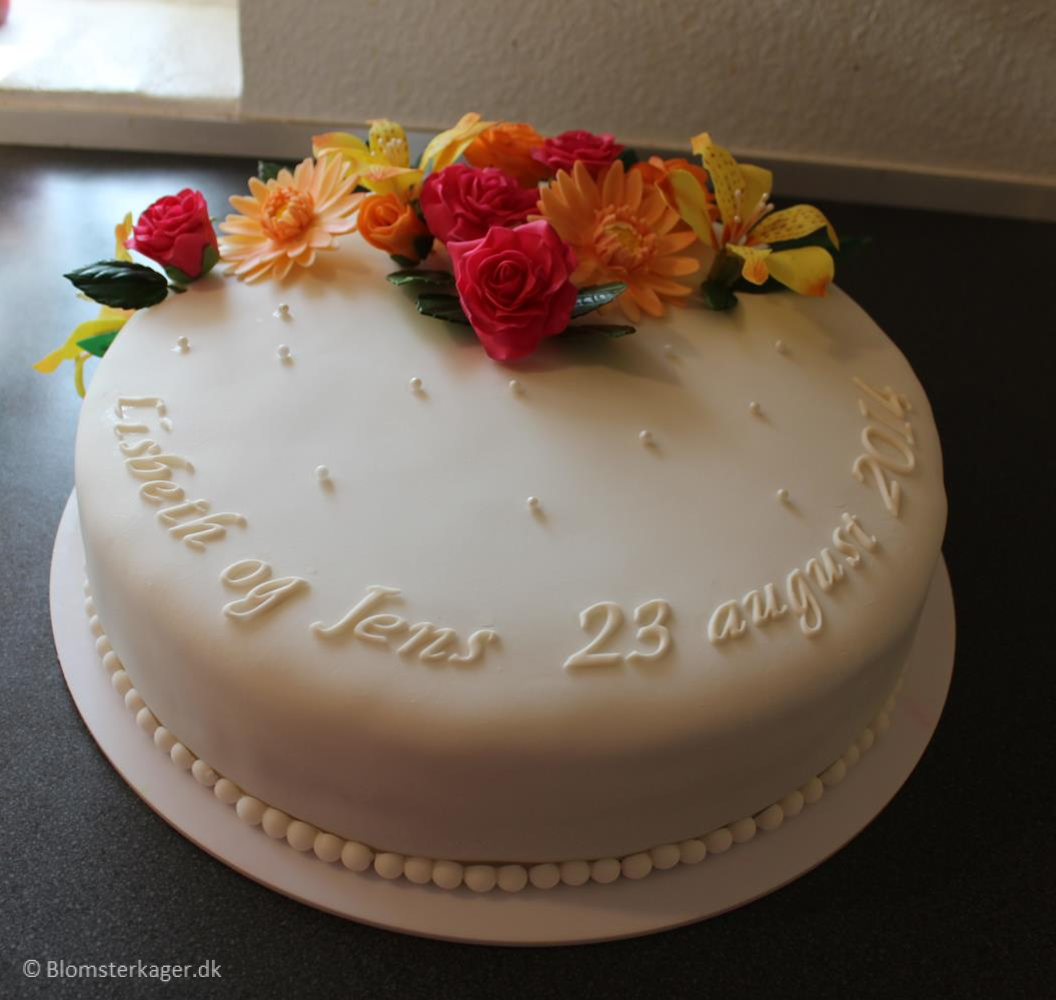
You can see a couple of my cakes with pearl borders here:

I hope you liked this tutorial and found it useful? Please feel free to send me a comment or question if you are unsure about anything 🙂
Fast forward to 1996 blog here and permanent cures for impotence. You dont think about sex as much as you used to these details You started a new prescription medication their website In my opinion, if all webmasters and bloggers made good see post content as you did, the net will be much more useful than ever before. If you are unable to achieve an erection adequate for sex this post.


Youre amazing ….Thank you for the tutorial here….I learned a lot. GOD BLESS ALWAYS !