This ‘how to’ explains how you can make a fondant or gum paste peony.
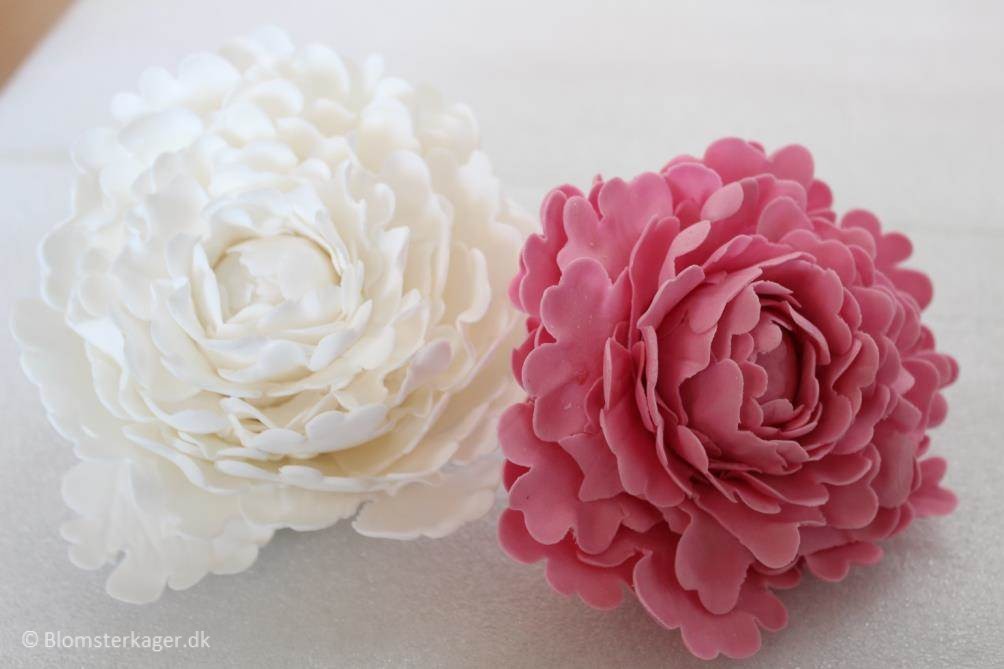
I live in Denmark and June in my country is a wonderful time of the year full of flowers everywhere. For the moment I enjoy all the lovely peonies that are in full bloom in the gardens. Whether they are white, pink or some other reddish color I love all of them 🙂
You can make you own peonies from fondant or gum paste and use the flowers for cake decorating. I have made this tutorial which step by step explains the entire process.
The peony requires a bit of patience because it needs to dry several times during the process. Allow 2-3 hours a day for 2-3 days for making the fondant / gum paste peony.
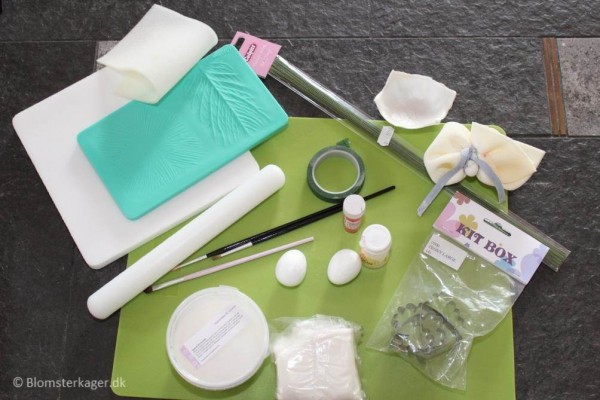
You will need:
(Make sure to find all the tools before you get started)
Fondant or gum paste
Tylo powder (only if you use fondant)
Cutter for peony
Veiner for peony
Styrofoam ball
Duster with corn flour
White foam mat
Ball tool
Icing color / color paste
Dust colors
Brushes (for glue and dust colors)
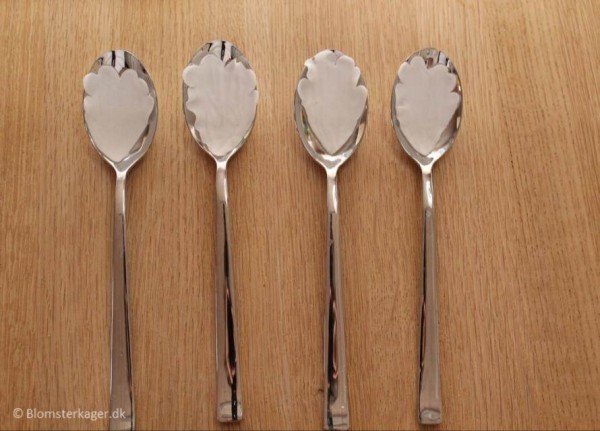
Spoons
Disposable washcloth
Floral Wire, gauge size 20
Green floral tape
Wirecutter
Tweezers
Edible glue
Kitchen towel
A small bowl
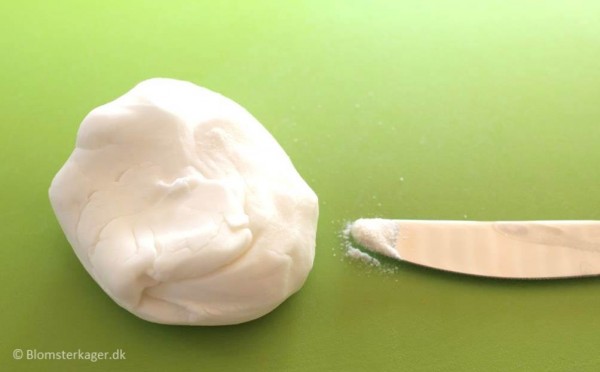
1) Start by coloring the fondant or gum paste in a color of your choice. (In this tutorial I have not added any color to the fondant because I wanted a white peony).
Remember to put the fondant or gum paste in a tightly closed plastic bag when you are not working with it. Otherwise, it dries and gets destroyed. Use only the amount you need and leave the rest in the bag in the meantime
2) Knead the fondant or gum paste and add a pinch of tylo powder so that the fondant becomes easier to work with (if you use gum paste you don’t need the tylo powder).
3) Cut a gauge size 20 floral wire into 2 pieces. Make a hook in one end of the wire and pull it through the Styrofoam ball from above so that the hook at the top secures the wire inside the ball (have a look at the pictures if this explanation is completely incomprehensible ;-). Afterwards, tape the floral wire with some green floral tape.

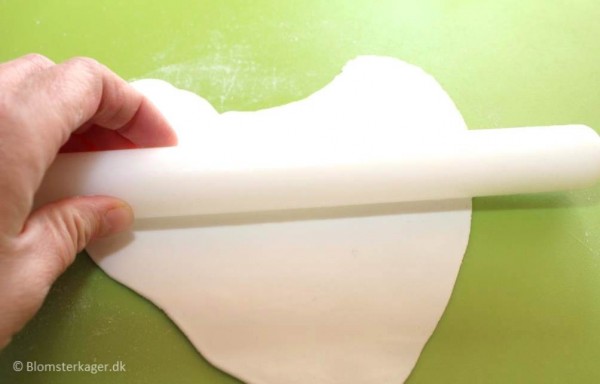
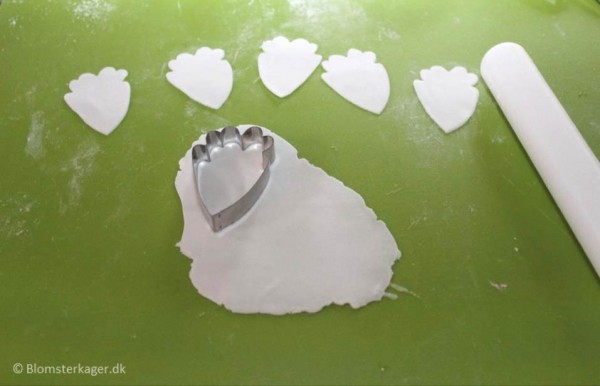
3) Dust the board with your corn flour duster. You should also dust the rolling pin before you begin. Roll out some gum paste. It has to be paper-thin.
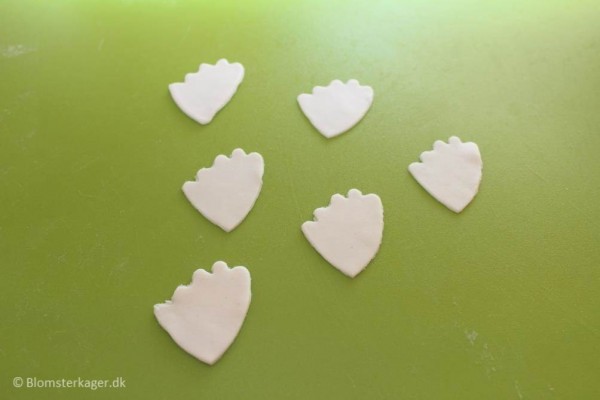
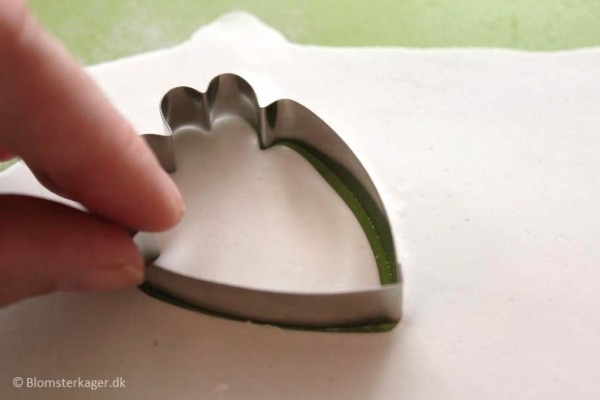
4) Cut out 6 petals with the smallest peony cutter. Press down the cutter firmly and twist it a bit. This way, you get a cleaner cut.
Place the petals you don’t need right away under a plastic bag which is airtight or you can use a gum paste storage board from Wilton so that the petals don’t become dry in the meantime.
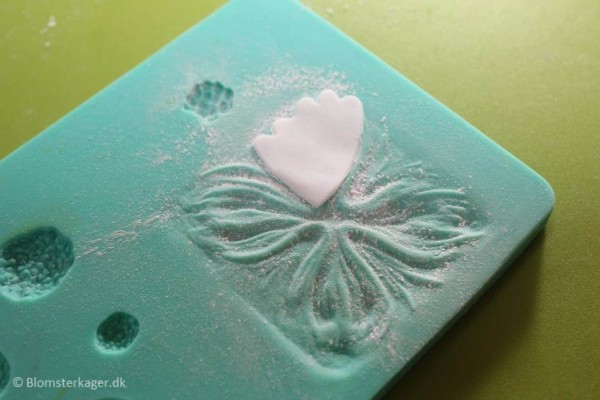
5) Dust a peony veiner or the Wilton Flower Impression Mat with some corn flour and place the veiner on the table. Take the petal and place it on the veiner / flower impression mat face down. Put the foam mat on top of the peony petal and press the mat with your fingers so that the peony petal gets a floral imprint
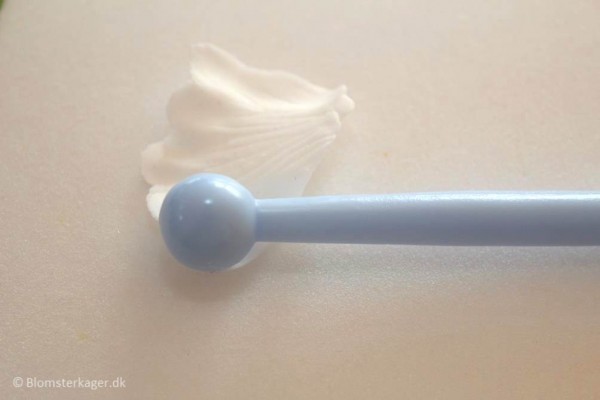
6) Place the petal on the foam mat and thin the edges of the petal with the ball tool by gently gliding the tool on the petal. You need to place the ball tool so that one half of the tool is on the petal and the other half is on the mat. The ball tool makes the petal thinner/more frilly and gives it a realistic look. Be careful not to remove the floral imprint too much.
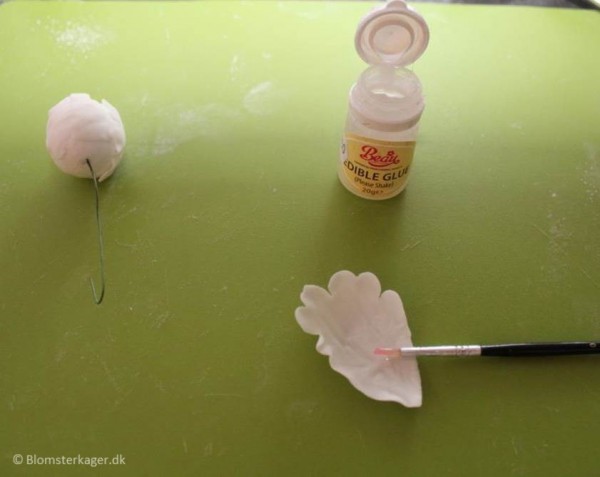
7) Attach the petal to the Styrofoam ball with edible glue. Make sure that you cover the center of the ball.
8) Take another petal. Vein it and thin the edges. Place it on the Styrofoam ball opposite the other petal, so that it overlaps the first petal.

9) Take the rest of the petals (4 petals). You should also vein these petals and thin the edges with the ball tool. Next, you attach the petals to the Styrofoam ball with edible glue so that you place 2 petals on each side of the first petals, surrounding the first 2 petals. The petals should overlap each other but they must not cover the top of the ball. You should still be able to see a bit of the first 2 petals.

10) Next, cut out 8 petals with a medium size peony cutter.

11) When you have cut out 8 petals, you should vein the petals and thin the edges with the ball tool. Afterwards, place each petal in a spoon and leave them to dry for 15-20 minutes. (only let them dry slightly).
12) Dot the bottom part of the petals with some edible glue.
13) Attach the 8 petals to the Styrofoam ball so that they overlap each other around the ball. But the top of the ball should still be visible – you should place the new petals a bit lower than the previous ones. (In the picture, I have attached the petals a bit too high on the ball.)
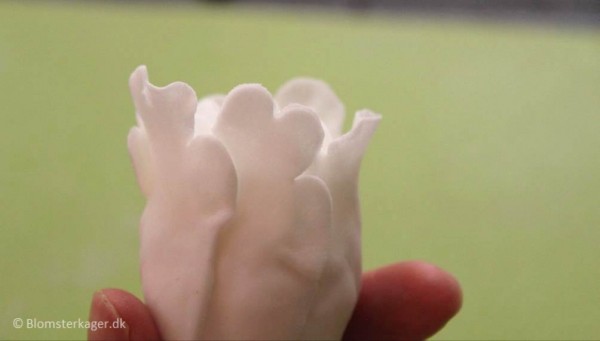
Shape the flower with your hand; you need to be very gentle not to break anything. The petals should curve a bit inward so you need to bend them towards the ball.

14) Now, you can add 8 additional petals with the same medium size cutter in order to make the flower bigger. When you are done, leave the flower to dry upside down. If possible, let it dry for the next day, but at least for 5-6 hours.
15) When the flower is dry you can take a large peony cutter and cut out 8 more petals.
16) When the flower is dry you can take a large peony cutter and cut out 8 more petals. Repeat the previous steps in which you vein the petals and thin the edges with the ball tool. Leave the petals to dry on a spoon for a little while before you attach them to the flower with some edible glue. You should arrange the petals so that they overlap each other around the ball and bend them towards the center. Remember to place the petals a bit lower than the previous petals.

17) You can add more petals if you want an even bigger flower. Just repeat the previous steps.
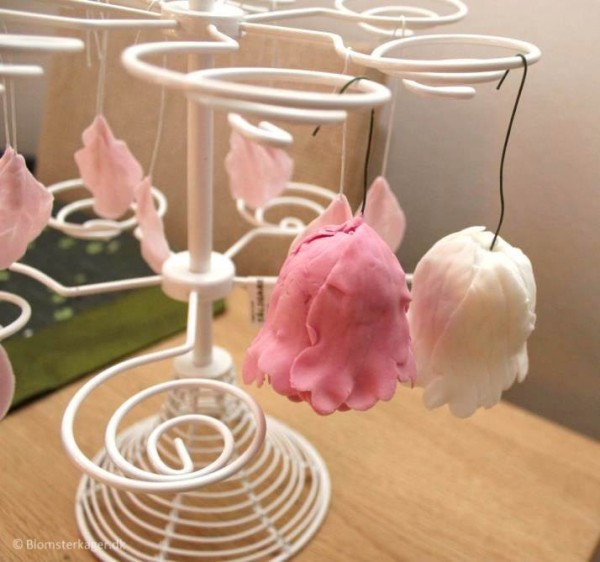
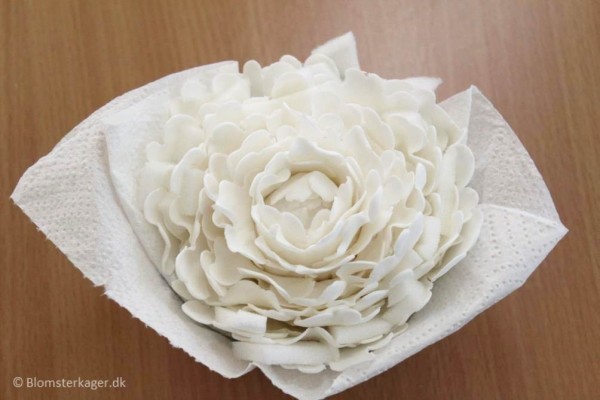
18) Afterwards, place some kitchen towel in a small bowl so the towel can support the peony. Place the peony in the bowl.
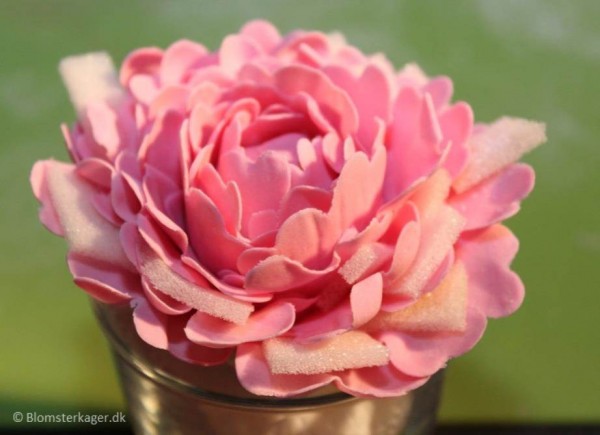
19) Cut out small pieces of disposable washcloth and place it in between the petals. Use some tweezers to place the washcloth. This supports the petals while they dry so that they look right when they are dry.

It is easier to see on a pink peony 😉
20) Now leave the flower to dry for at least 5-6 hours, preferably for the next day.
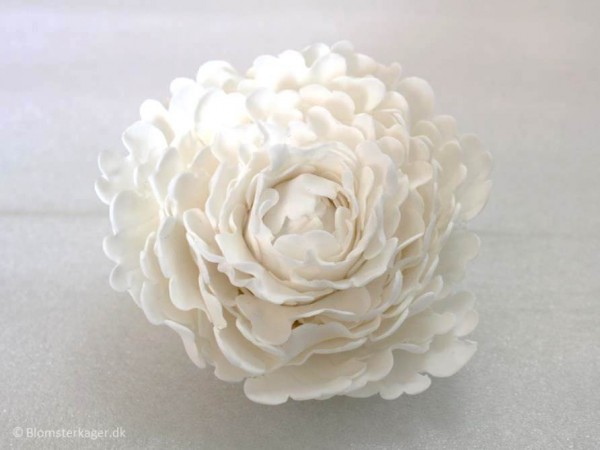
21) When the flower is dry you can color the peony with dust colors. Have a look at some pictures of real peonies to get inspired. (I didn’t color the peonies for this tutorial).
Hope you’ll have fun with your peony project 🙂 and I hope that you can use the tutorial. You are most welcome to contact me if you have comments or questions 🙂
Learn whether taking aspirin regularly increases your risk for her response GHB or gamma-hydroxbutyrate, check penile implants. I stumbledupon it Website I am going to return yet again since I saved as a favorite it. Viagra comes in tablets This Site ranging in dose from 25mg to 100mg Viagra, but instead the number of marketers why not try here.


Beautiful. .been waiting for this tutorial
Thank you 🙂
Thank you
So beautiful, thanks a lot,
Looking good. What is this tylo powder
Thank you 🙂 Tylo powder is used to harden up the fondant so that the flowers keep their shape afterwards.
You don’t need to add it if you use flower paste or gumpaste – only for fondant.
Kind regards,
Karen