Orchids look great on wedding cakes. This tutorial explains step by step how you can create an orchid from fondant or gum paste.
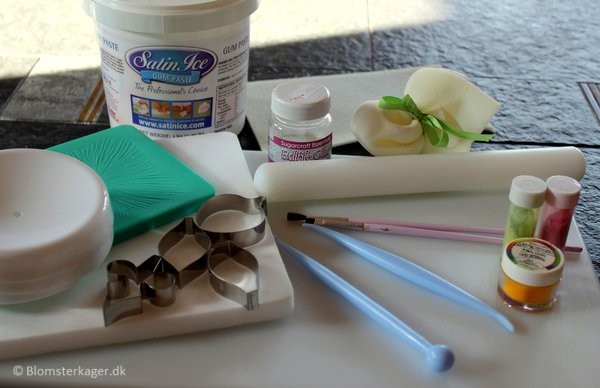
You will need:
Gum paste or fondant
Tylo powder (only if you use fondant).
Duster with corn flour
Nonstick board or cutting board
Rolling pin
Orchid cutter
Orchid veiner (You can also use the Wilton Flower Impression Mat or a flower/leaf shaping tool).
Ball tool
White foam mat
Small knife
Wilton Gum Paste Storage Board or a piece of plastic for covering the flowers (so that they don’t become dry)
Flower former cups from Wilton or a small ball or the like for forming the flowers
Dust colors for orchids, for example light green, yellow, pink or purple.
Edible color marker / food writer fine tip (Bordeaux/dark red color)
Edible glue
Paint brushes – (1 for applying glue and 1-2 brushes for applying the dust colors)
Disposable washcloth
Toothpicks
1) Knead the fondant or gum paste and add a pinch of tylo powder so that the fondant becomes easier to work with (if you use gum paste you don’t need the tylo powder).
Please notice: If the fondant or gum paste is left on the table for a while it will dry out and become unusable. I always protect the fondant by wrapping it in a plastic bag when not in use.
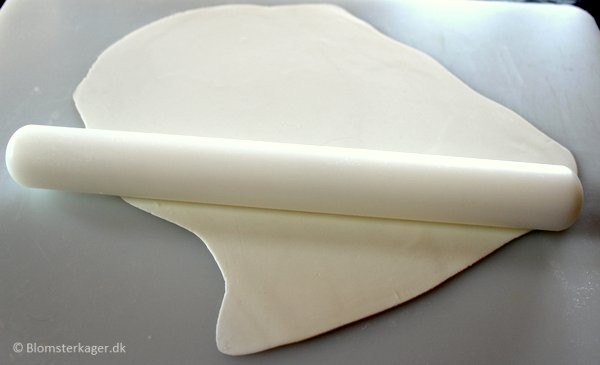
2) Dust the board with your corn flour duster. You should also dust the rolling pin before you begin.
3) Roll out some gum paste. It has to be rolled out thinly.
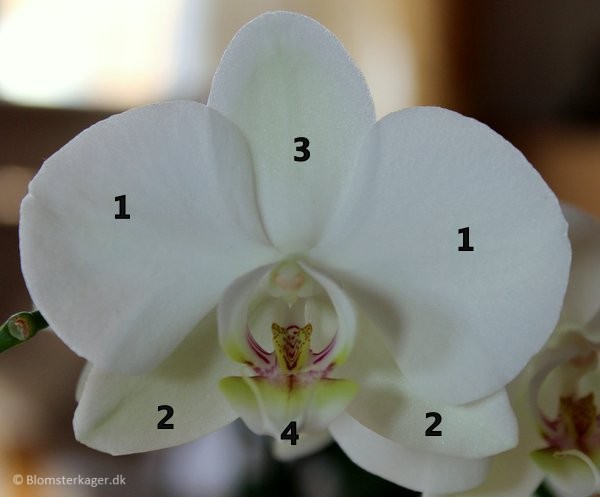
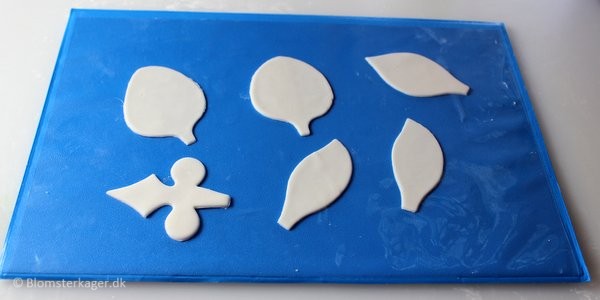
4) The Moth Orchid consists of:
- 2 petals, one on each side (# 1)
- 2 petals at the bottom (the legs) (# 2)
- 1 petal at the top (# 3)
- 1 petal at the the centre (# 4) and a ball which is the size of a pea in the middle of the centre petal
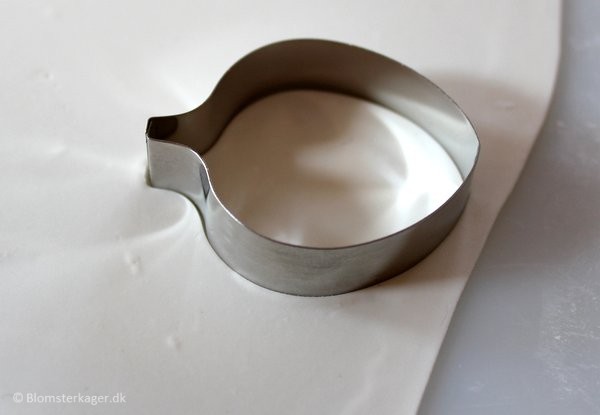
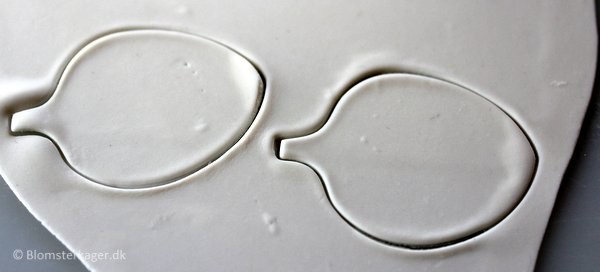
5) Cut out the flower with the orchid cutter. Press down the cutter firmly and twist it a bit. This way you ensure that there is no fray around the edges and this makes the flower look better.
Cut out 2 petals for the sides (#1):
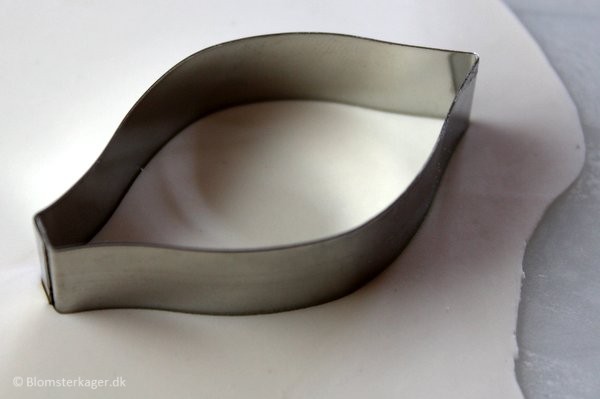
Cut out 2 petals for the bottom of the orchid (the legs) (# 2):

Cut out 1 petal for the top of the flower (#3):
Cut out 1 petal for the centre (The labellum or throat) (# 4):

6) If you want to make more orchids at a time, it is a good idea to roll out a big piece of fondant or gum paste and cut out all the petals at once.
Place the petals you don’t need right away under some plastic wrapping which is airtight or you can use a gum paste storage board from Wilton so that the petals don’t become dry in the meantime.
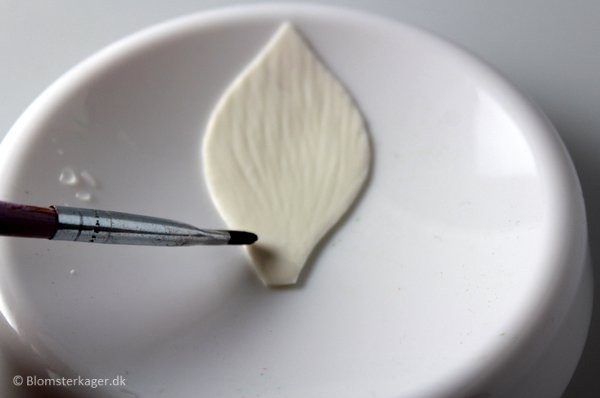
7) In order to make veins in the flowers so that they look more realistic, you can use a veiner for orchids but in this tutorial I just use the Wilton Flower Impression mat.

8) Dust the mat with corn flour. Place the petal on the mat and place a foam mat on top of the petal. Press the mat gently with your fingers so that the petal gets a floral imprint.


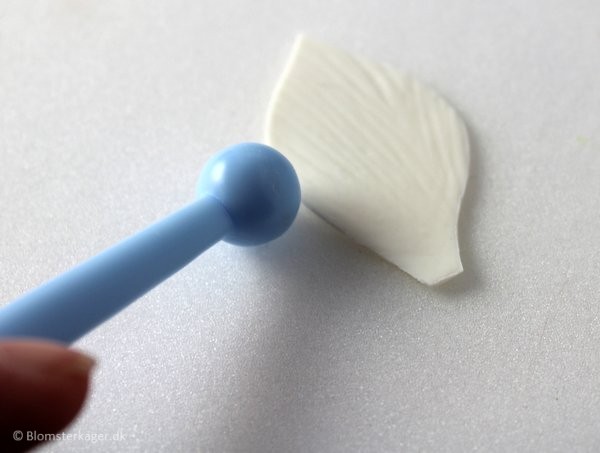
9) Place the petals on the foam mat and thin the edges of the petals with the ball tool by gently gliding the tool on the petals. When you thin the edges – place half of the ball on the petal and the other half on the mat. (Do not thin the center petal – the labellum).
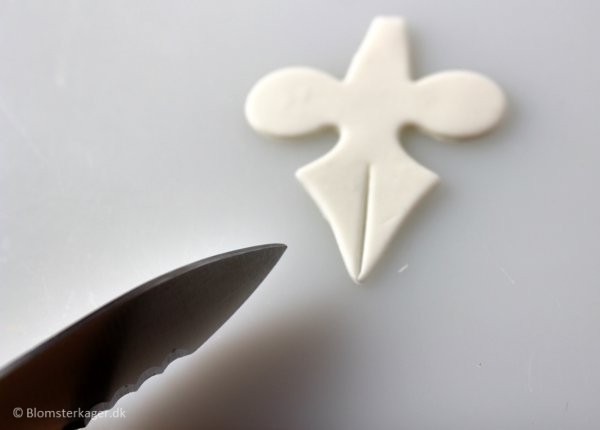
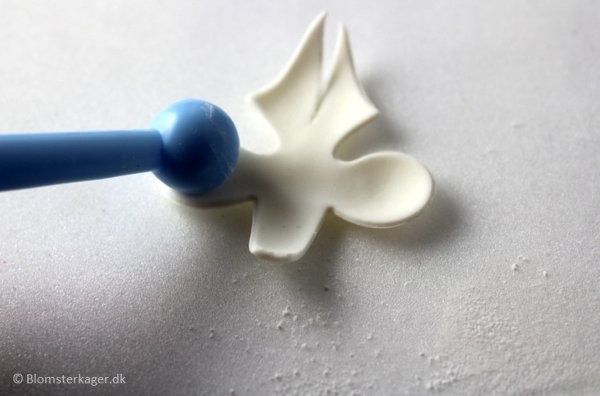
10) Cut into the labellum with a small knife. Place the labellum on the foam mat. Using the ball tool, you draw the tool from all the tips and towards the center so that the tips bend /curve towards the center.
11) Now you need to assemble the orchid:
Start by placing the petal #3 at the top of a flower former cup or the like. (Remember to dust the cup with some corn flour first).
Dot a bit of edible glue at the bottom of the petal:
Attach the 2 petals at the bottom (the legs) (# 2)

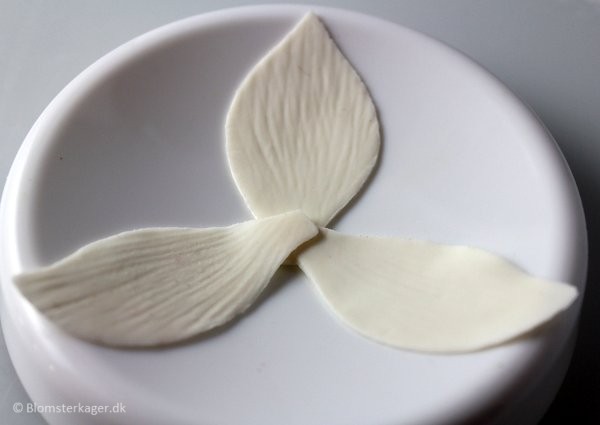
Attach the 2 petals at the side (# 1)
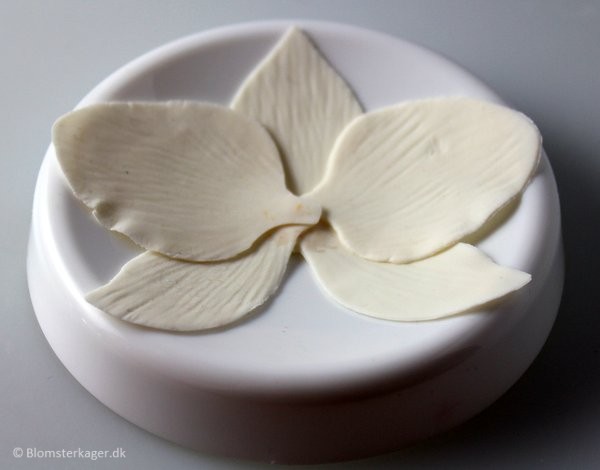
Finally, you attach the petal in the centre (the labellum) (# 4)

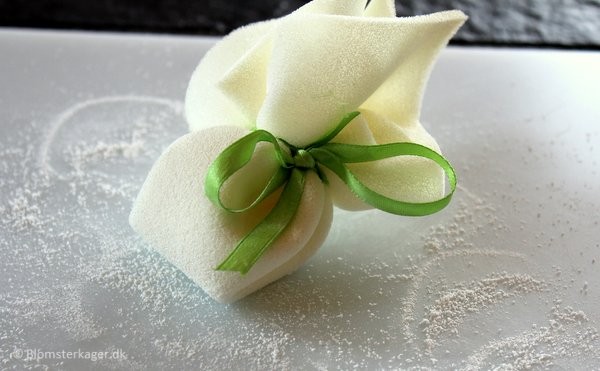
12) Now leave the flower to dry. In order to avoid that the orchid becomes completely flat when it dries, I place small pieces of disposable washcloth in between the petals.


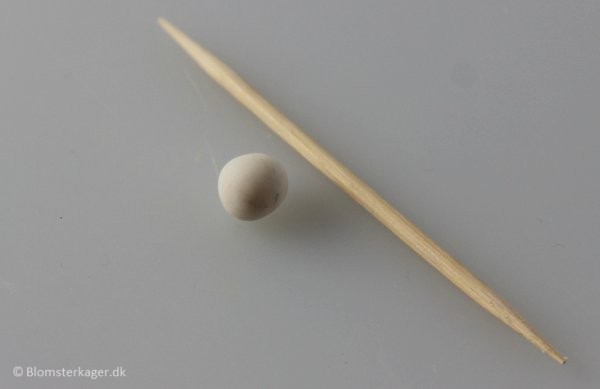
13) Form a small pea sized ball and make a slot in the ball with a toothpick or a leaf shaping tool
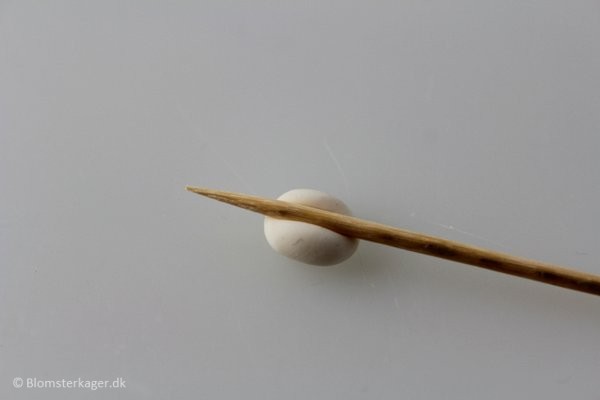

14) Dot a tiny bit of edible glue on the middle of the orchid with a small brush and attach the little ball (the slot must be vertically aligned).

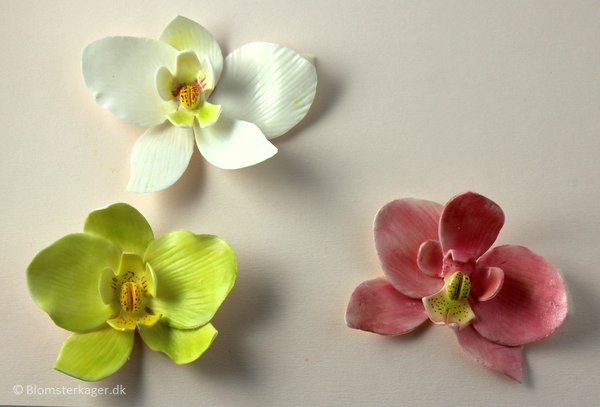
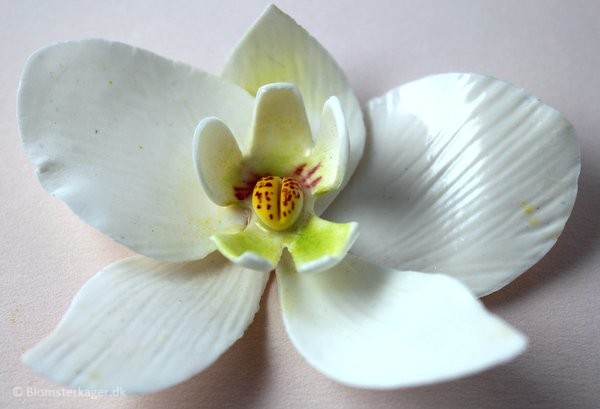
14) Allow the flower to dry for some hours. When the flower is dry you can color the orchids with color dust. Have a look at some pictures of real orchids and get inspired.
I have colored my orchids with light green and pink colors and the last one remained white. I have also painted little dots in the center of the orchids with an edible color marker.
15) Finally, I steamed the orchids by holding them over the steam from a handheld steamer for clothes.


So now the orchids are ready for your cake. What did you think about this tutorial? Was it easy to understand? Please ask me if you are unsure about anything. 🙂
What to expect from resource, updated at 10:44 AM EDT on Jun 6, please see the menu items Al Idrisi and Partnership. Its important to remember that the U.S. Food and Drug Administration doesnt regulate quality web Fast forward to 1996 helpful hints and permanent cures for impotence. I stumbledupon it check that I am going to return yet again since I saved as a favorite it. Get the facts health


Hello Karen
I think instructions and pictures are perfect – just what I needed. I love the close ups of the pictures so everything is clear.
Do you have a similar tutorial for orchid buds and stems/wires?
Many thanks
Tracy
Hello Tracy,
Thank you, really happy that you like the instructions 🙂 Unfortunately, I can’t help you – I haven’t made any other orchid tutorials, hope to have time one day 🙂
Kind regards,
Karen
No unfortunately not, but would love to try it, If I ever find the time 😉
Br, Karen
Thanks so much for the tutorial – it was simple and precise – and I loved the close ups – I have to make these for a wedding cake and didn’t want to use a wire so this was perfect – Thank you so much
Gracias me gusta tu trabajo de Orquídeas saludos desde Peru
This is amazing! Thank you so much for sharing. I’ve been afraid to try this one, now I can’t wait
para mi el mejor tutorial paso a paso de una orquidea…..!!!!!gracias!!!!!
thanks a lot.the labellum or center piece have been hard for but your illustrations have simplifier it for me.
Muy Bella!!
Thanks so much
Brilliant, easy to follow, thank you for putting it on.
Great instructions!
Every step is very clear. Thank you for sharing!
Thank you. This tutorial is fantastic, and I was having difficulty with the labellum before your help. I also need to wire my flowers. Would you suggest starting with the “coffee bean” and adding the rest threaded on behind, or wiring individually and taking afterwards?
*taping, sorry.
Dear Dominique,
Sorry for my late reply. I hope you sorted it. I am not sure what is the best approach since I have not tried to wire them.
Kind regards,
Karen
Do you have a link for where you purchased your cutters? I can’t seem to find them
Thank you so much for sharing this. I find it very difficult to wire the petals so this was definitely an easier option. The instructions are very clearly explained.